Tips for great photos and videos
Keota Silaphone · | Science Communication | Applying Science | 4 commentsKeota Silaphone
To capture a great photo, some of the students had to lay on the ground or in my case sit in a roadside ditch. I took photos of cover crops, but changed my perspective each time, only to discover that the perspective from the roadside ditch happened to be the most impactful.

The discussions we’ve had in class the last two weeks have resonated with me, and now during my 40-minute commute to and from work I find myself seeing opportunities to take photos of agriculture in action instead of listening to NPR. I’ve even scoped out potential safe parking spots along Route 50 so that I can take a few pictures. And, I’ve gone so far as to select certain spots based on the depth or width of the ditch. If the ditch is too wide I may not be able to jump across and get a close up shot, and if the ditch is too deep I may not get out! Safety comes first my fellow photographers as there is no need to take unnecessary risks.
During this week’s class, Guy Stephens and Jane Hawkey provided additional photography tips that are well worth mentioning.
- Dedicate time to taking pictures. If you have intent to take photos your chances of capturing or making a great photo increase dramatically.
- Prepare yourself for taking photos. This includes thinking about what you intend to capture and who and what are the important subject(s) as well as checking your equipment for charged batteries, spare batteries, a battery charger and additional memory cards. You may even have a diffuser or wide-angle lens that could help you take that great shot.
- Take photos all of the time. You’ll get rid of most of them, but in that 1,000s of pictures chances are you’ll find a great one.
- Create a list of subjects you would like to take a picture of. As part of your list, know the time of year to take pictures of your subjects. For example, now is a time to get photos of farmers applying fertilizer and tilling their fields, and September is a time of year to get pictures of farmers harvesting crops. To be more specific, know what time of day will be the best time to take pictures. Will morning light or evening light create the picture you envision? This type of list can help you stay focused on the tasks at hand.
- Have a story in mind when taking photos. To help create this story, review photos of places you intend to visit on Flickr to see what others have shot and observe the time of day when the pictures were taken.
- Bring a notepad and pencil when visiting different areas to take photos. You’ll be able to jot down the location and time of day during your visit to supplement your photo.
The photography tips also apply to video production. Dylan Taillie presented a convincing powerpoint presentation on why videos should be part of scientific research. By adding a video to a presentation, rich content can be added and the video may turn out better than a photo. While video usage is in its infancy in the science world, there’s a lot of opportunity for it. Given technological advances, it’s fairly easy to make a video (you can make one on your iPhone). Since watching Dylan’s presentation, I’ve spoken to him to arrange a flight using IAN’s drone to acquire aerial video coverage of my study watershed for my research.
So how did students apply their photography skills? Check out the great photos below each of which emphasizes a composition technique.:
- Rule of thirds

An example of rule of thirds focuses on a southern flying squirrel. Photo credit: Juliet Nagel - Fill the frame
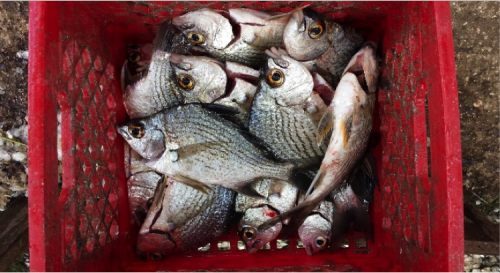
A great shot of a fisherman’s catch where red contrasts with fish. Photo credit: Wilmelie Cruz Marrero 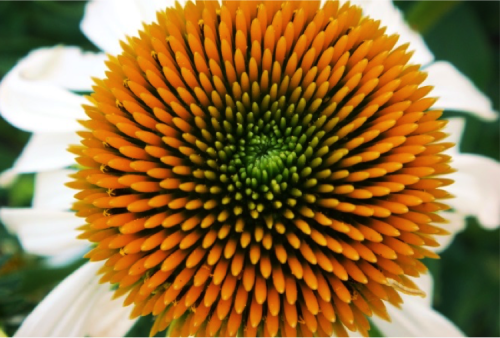
Juliet Nagel filled the frame with a white coneflower. The pattern displayed is mesmerizing. Its concentric colors of green, orange, to white ties in well. This image feels like the flower is up close and personal. - Patterns

Christina Goethel had to lay on the deck of the Robert C. Seamans ship to take this shot 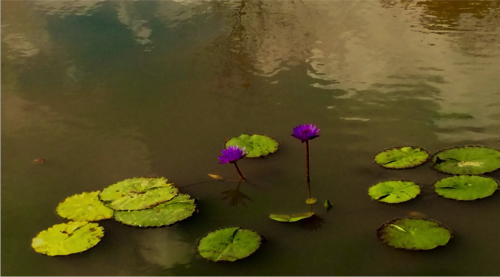
Water lilies were taken by Marybeth Shea at Kenilworth Aquatic Gardens during the afternoon in late August. The visual hierarchy of this image is distinct – the purple blossoms and green lily pads are captured beautifully against the background of water. The water offers interest as well. Upon closer inspection, reflections of clouds, the sky, as well the water lilies can be seen. - Leading line
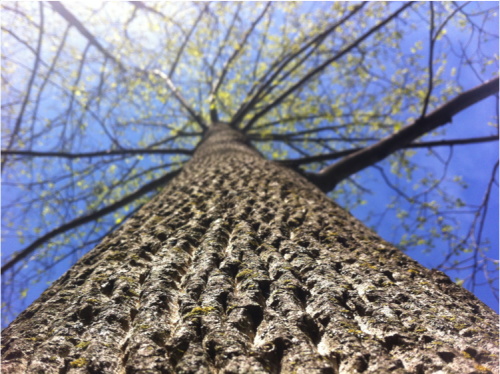
To capture this perspective of a tree, Ben Wahl leaned up against the tree. In the foreground one can feel the roughness of the tree trunk. As your eyes follow the trunk to the top, you’re met by blue skies and a glimmer of sunlight just off to the left. 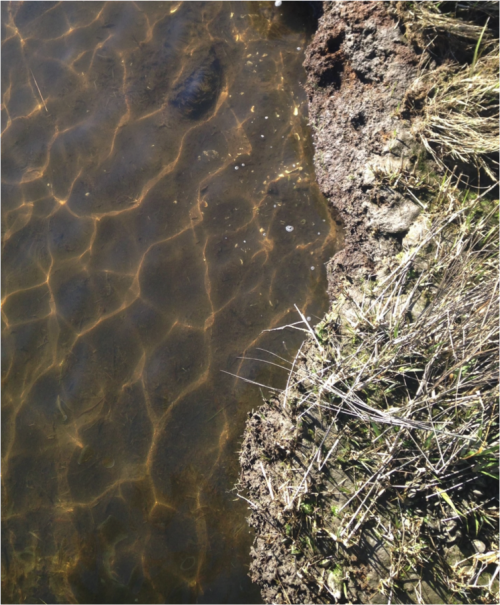
Noelle Olsen took a photo of where the marsh meets the water to given a sense of leading lines. This photo also offers an interesting texture with the roughness of the marsh grass and sun dappled water ripples.
Next Post > A tour of the National Weather Center in Norman, Oklahoma during an extreme weather day
Comments
-
Wilmelie Cruz 10 years ago
I think you made a good point about dedicating time to take pictures. Also, sometimes you just have to take advantage of your surroundings and have your cellphone/camera ready for a spontaneous shot. I agree with you safety comes first.
-
Ben Wahle 10 years ago
In addition to the time, I think you did a great job explaining just how much planning and thought is required to get a good photo. Things like having your subject and a story in mind even before you set up to take a shot are really important. That way when you're crouched down in a ditch you can spend less time thinking about what to shoot and more time taking the pictures!
-
MbS 10 years ago
I am struck by the physicality of photo making, both on the ground and by re-training the eye.
i am really pleased to now have a working grammar of images, where we can articulate WHY we like an image. Critique is an essential skill in science thinking, so this work will improve our abilities to be specific as to the WHYS of analysis and not just an unclear "thumbs up" or "thumbs down."
Worth noting too is that the collegiality of this class makes for improved science visualization products. I found myself more sensitive about the photos, really. Perhaps our cameras are more extension of self than we know....thank you, colleagues for kindness and clarity.
-
Juliet Nagel 10 years ago
I really enjoyed this section of the class, it was wonderful to see the amazing photos that others shared.
One thing we talked about is that if you ask someone whether they like a photo, they'll be able to tell you yes or no, but explaining why is much more difficult. Before learning about some of these guidelines (rule of thirds, patterns, etc.), I'm not sure I could have said why I liked certain pictures more than others. Having this awareness of what helps to create a striking image is very helpful in planning a photo.
We also discussed how it is worthwhile to take a moment to scan the image in your viewfinder before pressing the button. Check the edges and the background. Often we get so focused on the central image itself, we miss the fact that a tree limb appears to be coming out of someones head! A quick check, and two steps to one side, and you can avoid those problems.